
Rice Crispy Peanut Butter Balls

No-bake, buttery peanut butter and crisped rice treats coated in chocolate — a quick, crowd-pleasing snack perfect for parties and lunchboxes.
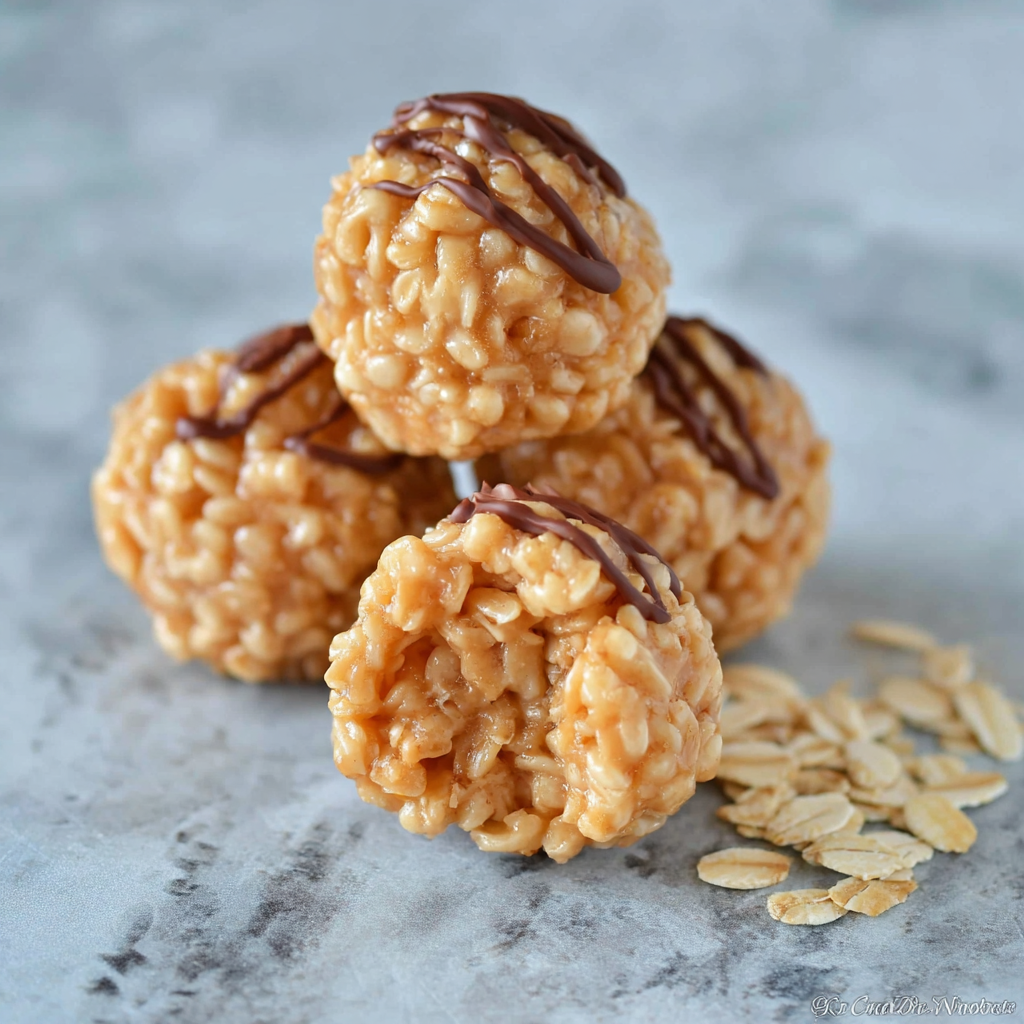
This recipe was born from a weeknight desire for something nostalgic and quick: Rice Crispy Peanut Butter Balls. I first made these when I wanted a dessert that tasted like the peanut butter cups I loved as a kid but required no oven and very little fuss. The mixture of creamy peanut butter and crisped rice creates a texture contrast that feels indulgent but still familiar. The outside chocolate shell adds a glossy finish and a satisfying snap. Each ball brings that childhood comfort with an adult-friendly balance of sweet and salty.
I discovered this combination during a hectic holiday season when I needed portable treats for a cookie swap and wanted something that travelled well. They stored beautifully in airtight containers, and guests appreciated a dessert that didn't melt easily and offered a crunchy surprise in every bite. I make them in batches now for after-school snacks and last-minute get-togethers because they come together quickly and everyone, from toddlers to grandparents, reaches for seconds.
Why You'll Love This Recipe
- Ready in about 30 minutes from start to finish, with most of the time spent chilling while you clean up.
- Uses pantry staples you likely already have: creamy peanut butter, crisped rice cereal, powdered sugar, and chocolate.
- No baking required, which makes this ideal for warm days, kids helping in the kitchen, or minimal cleanup.
- Flexible make-ahead options: they hold well refrigerated for a week and can be frozen for longer storage.
- Kid-friendly texture and flavor, yet sophisticated enough for holiday platters when coated in dark chocolate and sprinkled with sea salt.
- Makes about two dozen bite-sized pieces, perfect for parties, lunchboxes, or snack jars.
I remember the first time I served these at a neighborhood potluck; someone asked for the recipe within five minutes. My kids declared them "officially the best snack" and even our finicky aunt went back for more. The simplicity of ingredients and the flattering finish from a thin chocolate coat make them feel special even though they are effortless to prepare.
Ingredients
- Creamy peanut butter: Use 1 cup of a smooth, high-quality brand such as Jif or Skippy for a silky texture. Natural peanut butter can be used but may need a touch more powdered sugar to stabilize the mix.
- Crisped rice cereal: About 3 cups of regular crisped rice (for example, Rice Krispies). Choose a gluten-free labeled cereal if you require that, otherwise standard cereal works and provides the signature crunch.
- Powdered sugar: 1 cup adds structure and sweetness while keeping the filling soft. Sift before measuring to prevent lumps.
- Unsalted butter: 4 tablespoons, softened, to enrich the filling and help bind the cereal and peanut butter.
- Vanilla extract: 1 teaspoon to brighten flavors; pure vanilla extract works best for depth.
- Semi-sweet or dark chocolate: 10 ounces chopped or chips for coating; use a couverture or high-quality baking chocolate for a glossy shell. If dairy-free is needed, use a dairy-free dark chocolate alternative.
- Flaky sea salt (optional): A pinch per ball to heighten contrast between sweet and savory.
Instructions
Prepare the filling: In a large bowl, combine 1 cup creamy peanut butter, 4 tablespoons softened unsalted butter, 1 teaspoon vanilla, and 1 cup powdered sugar. Beat with a sturdy spoon or hand mixer on low until glossy and homogenous. The butter adds richness and helps the mixture hold shape; if your peanut butter is very oily, chilling briefly makes it easier to work with. Fold in crisped rice: Add 3 cups crisped rice cereal to the peanut butter mixture in two additions. Fold gently to coat the cereal without crushing it. You want the cereal to remain distinct so each ball has a pleasant crunch. If the mixture is too sticky, add up to 2 tablespoons more powdered sugar, one at a time. Form the balls: Scoop about 1 rounded tablespoon of the mixture and roll between your palms into compact balls, placing them on a parchment-lined baking sheet. For uniform size, use a 1-tablespoon cookie scoop. Once formed, chill the tray in the fridge for at least 15 minutes to firm up; this helps them hold shape during coating. Melt the chocolate: Place 10 ounces chopped chocolate in a heatproof bowl over a pan of barely simmering water (double boiler) or melt in 30-second bursts in the microwave, stirring between intervals to prevent burning. Aim for a smooth, glossy texture and a temperature around 88 to 90 degrees Fahrenheit for tempered chocolate; if not tempering, simply melt until smooth and slightly cooled before dipping. Coat the balls: Using two forks or a dipping tool, lower each chilled ball into the melted chocolate and lift, letting excess drip back into the bowl. Return to the parchment-lined sheet and, if desired, sprinkle with a tiny pinch of flaky sea salt while the chocolate is still wet. Let set at room temperature for 30 minutes or speed up by refrigerating for 10 minutes. Storage: Store finished balls in an airtight container layered with parchment. Keep refrigerated for up to 7 days or freeze for up to 3 months. Thaw overnight in the refrigerator before serving for best texture.
You Must Know
- These provide about 120 calories per piece and are a concentrated source of protein and fat from peanut butter, so portion control matters.
- They freeze very well for up to 3 months; thaw in the refrigerator overnight to preserve texture and prevent condensation on the chocolate.
- Use labeled gluten-free crisped rice cereal if you need to avoid gluten, and choose dairy-free chocolate for a dairy-free variation.
- Rolling with slightly damp hands can reduce sticking, but avoid wetting too much; a light touch of neutral oil on palms also works.
My favorite aspect is how versatile they are: I can dress them up with a drizzle of white chocolate and colored sprinkles for holiday trays or keep them rustic with a sprinkle of sea salt for an adult snack board. Making a double batch and freezing half has saved many busy afternoons. Friends have told me these remind them of childhood candies but feel more sophisticated because of the texture and salt accent.
Storage Tips
Store these in an airtight container layered with parchment to prevent sticking. For short-term storage, keep refrigerated where they will maintain a firm center and glossy shell for up to 7 days. For longer storage, freeze in a single layer on a tray until solid, then transfer to a freezer-safe container or zip-top bag for up to 3 months. When reheating or defrosting, move the pieces to the refrigerator overnight; avoid room-temperature thawing to prevent moisture forming on the chocolate surface. If the shell loses its shine after freezing, allow to rest at room temperature for 20 minutes before serving.
Ingredient Substitutions
If peanuts are not an option, substitute sunflower seed butter one for one; it has a similar texture but a slightly greener hue and nuttier aftertaste. For a nut-free household, tahini produces an interesting savory result but may be runnier, so add an extra 2 to 4 tablespoons powdered sugar. Swap the semi-sweet chocolate for dark 70% if you prefer less sweetness, or use milk chocolate for a creamier, sweeter finish. To reduce sugar, replace half the powdered sugar with unsweetened cocoa powder and taste as you go; texture will change slightly, and the mixture may need more chilling time.
Serving Suggestions
Serve these on a small platter with seasonal fruit like sliced apples or pear for contrast, or arrange them on a dessert board with assorted nuts and dried fruit. For parties, place on decorative paper cups and label flavors if you’ve made variations. They also pair well with a strong coffee or an herbal tea that cuts through the richness. Garnish with a light sprinkle of toasted sesame seeds or finely chopped roasted peanuts for texture and presentation. For holiday gifting, stack in a small tin separated by parchment and add a ribbon.

Cultural Background
These treats are an American pantry classic with roots in mid-20th century no-bake confections that emphasize convenience and shelf-stable ingredients. The combination of peanut butter and chocolate is iconic in American dessert culture, echoing candy classics while adapting to a homemade sensibility. Crisped rice snacks became popular as cereals and convenience foods proliferated, and combining them with nut butter for texture and binding captures the era’s inventive, resourceful cooking. Regional twists appear across the country, from the addition of marshmallows in the Midwest to nut mix-ins in the South.
Seasonal Adaptations
Adjust the coating to suit seasonal themes: milk chocolate with red and green sprinkles for winter holidays, white chocolate with citrus zest for spring, or a drizzle of salted caramel for autumn. In summer, omit the extra chocolate shell for cooler storage and roll the chilled filling in toasted coconut or finely chopped pretzels for a fresher finish. For Halloween, mix in a few orange-colored candy pieces or use colored melting wafers. The recipe’s no-bake nature makes it ideal for warm months when the oven is undesirable.
Meal Prep Tips
Make a double batch and freeze half in individual portions so you have a quick grab-and-go snack. Freeze on a tray until solid, then pack in freezer-safe containers separated by parchment. When packing for lunches, include an insulated cooler pack to prevent chocolate bloom in warm weather. If prepping with kids, let them press the mixture into mini muffin liners instead of rolling to save time and keep hands cleaner. Keep a small cookie scoop on hand for uniform size and consistent chilling times.
These Rice Crispy Peanut Butter Balls are reliably simple yet feel special; they bridge childhood nostalgia and practical adult snacking. Give them a try, adapt the coating to your taste, and you’ll likely find yourself making them on repeat for school treats, gatherings, and quick homemade gifts.
Pro Tips
Chill the shaped pieces before dipping so they hold their form and prevent the filling from melting into the chocolate.
Use a 1-tablespoon scoop for uniform balls and consistent chilling and setting times.
If peanut butter is oily, stir it well and consider chilling it slightly before mixing so the filling binds better.
To prevent sticking when rolling, occasionally dust palms lightly with powdered sugar or brush with a tiny amount of neutral oil.
This nourishing rice crispy peanut butter balls recipe is sure to be a staple in your kitchen. Enjoy every moist, high protein slice — it is perfect for breakfast or as a wholesome snack any time.
FAQs about Recipes
How long do these keep?
Yes. Store in an airtight container in the refrigerator for up to 7 days or freeze for up to 3 months. Thaw in the fridge overnight.
What is the best way to melt the chocolate?
Use a double boiler or microwave in short bursts, stirring between intervals. Avoid overheating or burning the chocolate.
Tags
Rice Crispy Peanut Butter Balls
This Rice Crispy Peanut Butter Balls recipe makes perfectly juicy, tender, and flavorful steak every time! Serve with potatoes and a side salad for an unforgettable dinner in under 30 minutes.
Ingredients
Base
Coating (optional)
Instructions
Mix the base ingredients
In a large bowl, beat 1 cup creamy peanut butter with 4 tablespoons softened butter, 1 teaspoon vanilla, and 1 cup sifted powdered sugar until smooth and well combined. Taste and adjust sweetness if needed.
Fold in cereal
Gently fold 3 cups crisped rice cereal into the peanut butter mixture in two additions, keeping the cereal distinct to preserve crunch. Add up to 2 tablespoons more powdered sugar if the mix is too sticky to shape.
Shape into balls
Use a 1-tablespoon scoop to portion the mixture and roll between your palms into compact balls. Place on a parchment-lined baking sheet and chill in the refrigerator for at least 15 minutes to firm.
Melt the chocolate
Melt 10 ounces of chopped chocolate using a double boiler or microwave in short bursts, stirring frequently until smooth and slightly cooled before dipping.
Dip and set
Dip each chilled ball into the melted chocolate, tap off excess, and return to parchment. Sprinkle with flaky sea salt if desired and allow to set at room temperature for 30 minutes or refrigerate for 10 minutes.
Store properly
Store in an airtight container layered with parchment in the refrigerator for up to 7 days or freeze for up to 3 months. Thaw in the refrigerator overnight before serving.
Last Step: Please leave a rating and comment letting us know how you liked this recipe! This helps our business to thrive and continue providing free, high-quality recipes for you.
Nutrition
Did You Make This?
Leave a comment & rating below or tag
@flavordaisy on social media!
Categories:
You might also like...

Air Fryer Buffalo Cauliflower
Crispy battered cauliflower tossed in tangy Buffalo sauce — a spicy, vegetarian party favorite that's easy to make in the air fryer.
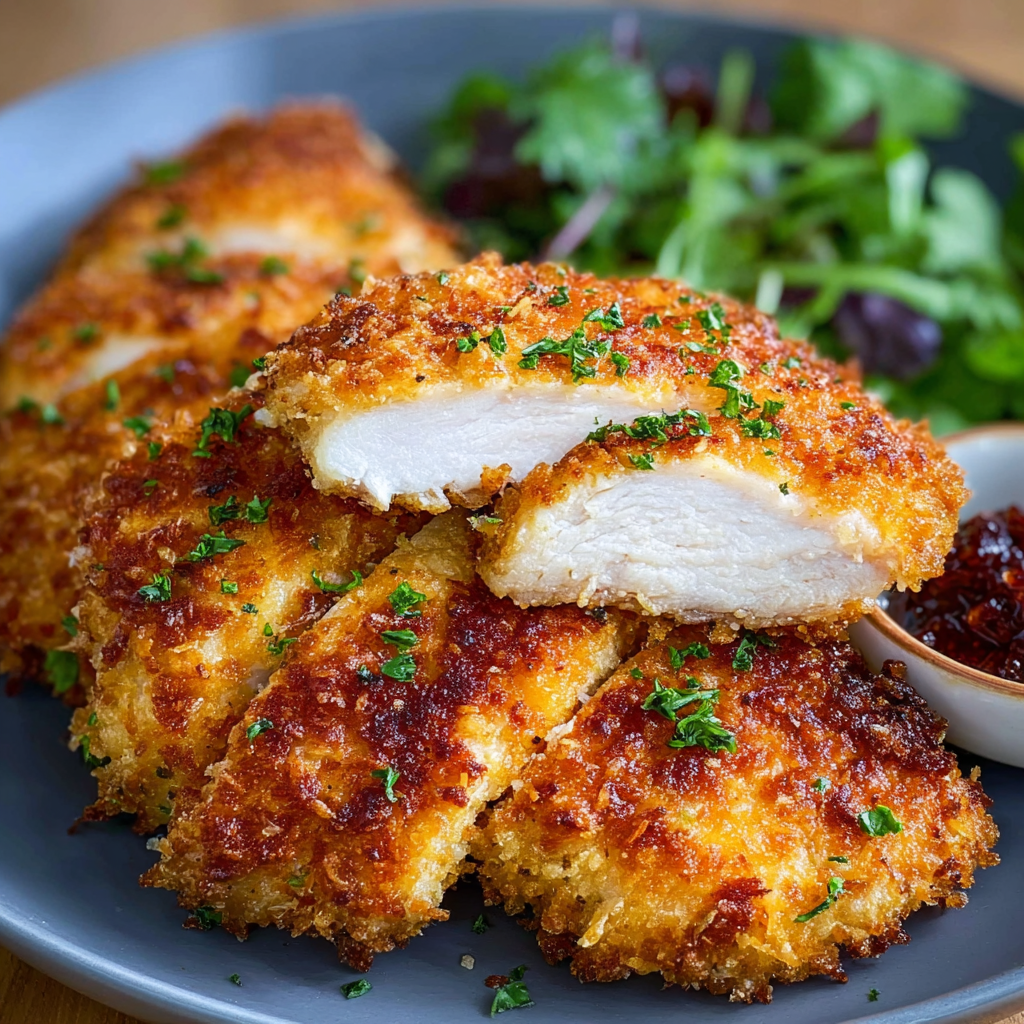
Air Fryer Parmesan Crusted Chicken
Crispy, golden air fryer chicken coated in a crunchy Parmesan-panko crust — a quick, family-friendly dinner that's juicy inside and perfectly seasoned.
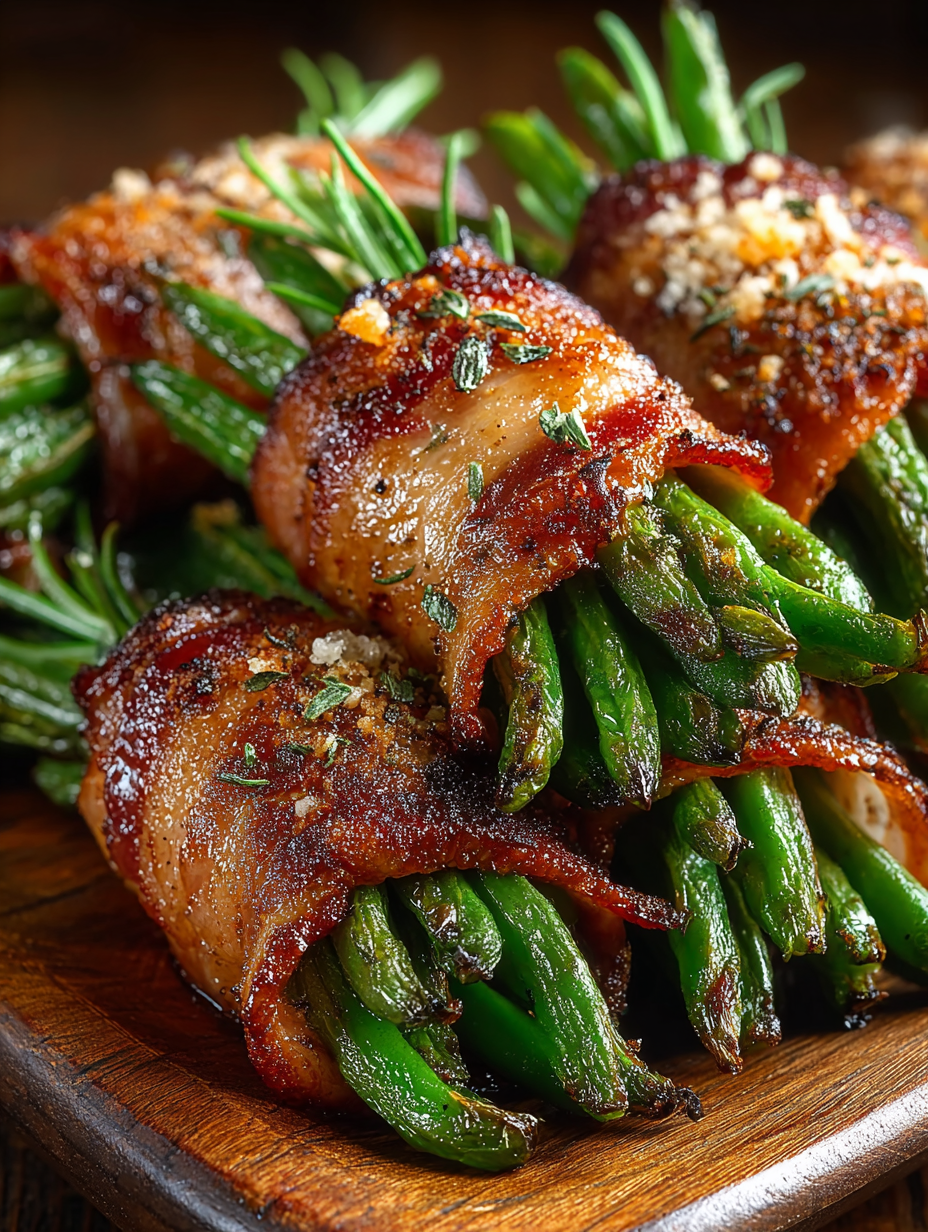
Bacon Wrapped Green Bean Bundles
Crisp tender green beans wrapped in savory bacon and finished with an optional sweet soy glaze. Perfect for parties and holiday spreads.
Did You Make This?
Leave a comment & rating below or tag @flavordaisy on social media!
Rate This Recipe
Share This Recipe
Enjoyed this recipe? Share it with friends and family, and don't forget to leave a review!
Comments (1)
This recipe looks amazing! Can't wait to try it.
Comments are stored locally in your browser. Server comments are displayed alongside your local comments.

Hi, I'm Chef!
What's Popular

30-Minute Meals!
Join to receive our email series which contains a round-up of some of our quick and easy family favorite recipes.