
No-Bake Christmas Cheesecake Bites

Festive, bite-sized no-bake cheesecake balls coated in colored melts and sprinkles — an easy holiday treat perfect for parties and gift plates.
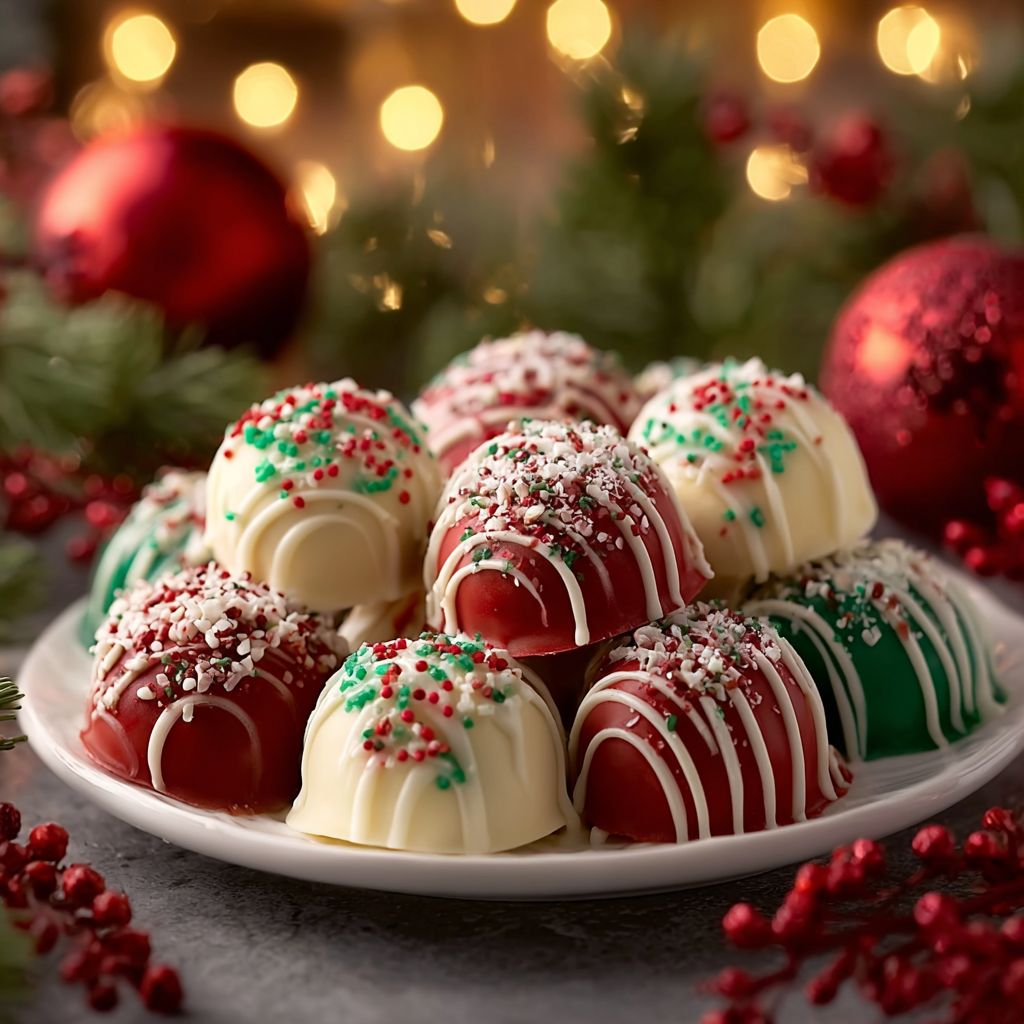
This no-bake Christmas cheesecake bites recipe is my go-to holiday party magic. I discovered this method one December when I needed a sweet for a last-minute cookie exchange and only had a few pantry staples on hand. The result was an instant crowd-pleaser: creamy, tangy centers with a whisper of vanilla and white chocolate, coated in cheerful red and green candy melts and finished with bright sprinkles. They are small enough for little hands, elegant enough for dessert platters, and reliably disappear within minutes.
What makes these bites special is the texture contrast. The centers are velvety from the cream cheese and whipped topping, with gentle crunch and flavor from crushed graham crackers or cookie crumbs. Once dipped in colored coatings, each bite gains a thin, crisp shell that gives way to creamy richness. I love serving these at tree-trimming nights, as edible gifts wrapped in cello, or as a quick addition to a dessert board. They travel well, keep in the fridge, and can be scaled up easily for larger gatherings.
Why You'll Love This Recipe
- Ready in roughly 30 minutes of hands-on time, with a short chill window — ideal for last-minute entertaining and weeknight baking swaps.
- Uses pantry staples like cream cheese, white chocolate chips, and graham crackers; no oven required which saves time and energy.
- High crowd-appeal: bite-sized for parties and kid-friendly, yet elegant when plated for adult gatherings.
- Make-ahead friendly: centers can be formed a day ahead and dipped just before serving to keep shells crisp.
- Customizable coatings and sprinkles let you match holiday themes effortlessly, including gluten-free or chocolate variations.
In my family the bites became a surprise hit; my niece declared them "the little snowballs," and neighbors asked for the recipe after one tasting. I experimented with different cookies and found that buttery graham crumbs give a nostalgic cheesecake note, while chocolate cookie crumbs make them feel more like truffles. These are forgiving to make and rewarding for novice cooks and seasoned hosts alike.
Ingredients
- 8 ounces cream cheese, softened: Full-fat cream cheese gives the best texture and tang. Let it sit at room temperature for 30 minutes so it whips smooth; brands like Philadelphia produce a reliable, consistent result.
- 1/2 cup powdered sugar: Powdered sugar sweetens gently and dissolves into the cream cheese for a silky finish; sift if you see lumps from storage.
- 1 teaspoon vanilla extract: Use pure vanilla extract for depth; imitation will work in a pinch but flavors are less rounded.
- 1 cup white chocolate chips, melted: White chocolate adds sweetness and helps stabilize the mixture. Gently melt to avoid scorching; choose high-quality chips for a cleaner flavor.
- 1 cup crushed graham crackers or cookie crumbs: Provides structure and a hint of crunch. For a gluten-free version use GF graham crumbs or gluten-free shortbread.
- 1/2 cup whipped topping (Cool Whip), thawed: Lightens the filling and makes rolling easier. For extra richness, use lightly whipped heavy cream instead.
- Red and green melting chocolate or candy melts: Separate bowls to create festive coatings; follow package directions for melting and thinning.
- Holiday sprinkles: For decoration and texture. Check labels if nut-free or allergen-free products are required.

Instructions
Prepare the cream cheese base: In a large mixing bowl, beat 8 ounces of room-temperature cream cheese with a hand mixer until smooth and free of lumps, about 1 to 2 minutes on medium speed. Scrape the bowl down with a spatula to ensure even texture; smoothness here prevents gritty bites later. Sweeten and flavor: Add 1/2 cup powdered sugar and 1 teaspoon vanilla extract. Mix on low speed until incorporated, about 30 seconds, then increase speed briefly to achieve a homogeneous cream. Taste and adjust vanilla or sugar slightly, remembering coatings and crumbs add sweetness too. Melt the white chocolate: Place 1 cup of white chocolate chips in a microwave-safe bowl. Heat in 20-second intervals, stirring between each, until fully melted and glossy. Allow the chocolate to cool for 1 to 2 minutes so it does not scramble the cream cheese when added. Gently fold the cooled chocolate into the cream cheese mixture until evenly distributed. Add crumbs and lift with whipped topping: Stir in 1 cup of crushed graham crackers or cookie crumbs until a tacky but firm mixture forms. Fold in 1/2 cup thawed whipped topping using a rubber spatula to keep the texture light; do not overmix or the whipped topping will deflate. The mixture should hold together when pressed. Chill to firm: Cover the bowl and refrigerate for 30 to 40 minutes to firm the mixture. Chilling makes rolling neater and prevents melting during the coating step. If you are short on time, freeze for 15 minutes but check frequently. Shape into bites: Use a 1-inch cookie scoop or teaspoon to portion the mixture and roll between your palms into smooth balls. Place them on a parchment-lined baking sheet about 1/2 inch apart. Return to the fridge for another 10 minutes to firm if they begin to soften while shaping. Prepare the coatings: Melt red and green candy melts in separate microwave-safe bowls following package directions. If the melts are too thick, stir in 1/4 teaspoon of neutral oil or vegetable shortening to thin to a dipping consistency. Warm, thin coatings give a shinier shell and smoother coverage. Dip and decorate: Using a fork or dipping tool, submerge each ball into the colored coating, tap to remove excess, and set back on parchment. Before the coating sets, immediately add sprinkles. For two-tone designs, drizzle the alternate color with a small spoon or disposable piping bag. Chill until set and serve: Chill the dipped bites in the refrigerator for 15 to 20 minutes until coatings fully set. Store in an airtight container and serve chilled or at cool room temperature. Enjoy within a week for best texture; see storage notes below for longer keeping.
You Must Know
- High in dairy: contains cream cheese, white chocolate and whipped topping; not suitable for dairy-free diets unless adapted.
- Freezing friendly: uncoated centers freeze well for up to 3 months; coated bites should be frozen on a tray before transfer to prevent sticking.
- Texture guidance: chilled centers make neater balls; if mixture is too soft, add a few tablespoons more crumbs to firm up.
- Allergen note: graham crumbs contain gluten; check sprinkles and melts for cross-contamination if serving to guests with allergies.
My favorite part is how versatile the base is. Once you master the simple folding and chilling technique, you can create themed colors or flavors quickly. At a recent holiday brunch I made three colorways and watched guests mix and match their favorites; it became an activity as much as a treat. The simplicity makes it great for baking with kids: they can roll balls and sprinkle, while adults handle the hot melts.
Storage Tips
Keep coated bites in a single layer or separated by parchment in an airtight container in the refrigerator for up to 7 days. Avoid humid conditions which can cause candy melts to bloom or soften. To freeze, place uncoated balls on a parchment-lined tray until solid, then transfer to a freezer-safe bag for up to 3 months. When ready to serve, dunk from frozen into warm melts; allow extra time for the coating to set. Thaw in the refrigerator for an hour before serving if you prefer a softer center.
Ingredient Substitutions
For a lighter version, swap full-fat cream cheese for Neufchâtel, but expect a slightly less creamy mouthfeel. Replace whipped topping with softly whipped heavy cream for a fresher dairy flavor. Use gluten-free graham or crushed gluten-free cookies to make the centers gluten-free. For a dairy-free approach, use a firm dairy-free cream cheese and dairy-free white chocolate, though texture will differ. Experiment with crushed Biscoff, chocolate sandwich cookies, or shortbread for interesting flavor twists — adjust crumbs to reach the same cohesive texture.
Serving Suggestions
Arrange the bites on a festive platter with fresh berries, candied nuts, and a dusting of powdered sugar for a holiday spread. They pair beautifully with hot cocoa, mulled wine, or coffee. For party favors, place three to six bites in clear cello bags tied with ribbon. Garnish each with a tiny edible gold star or crushed peppermint for added seasonal flair. Serve chilled for firmer texture or slightly warmed for a softer, creamier center.
Cultural Background
While these bites are a modern, no-bake take on classic American creamy desserts, they draw inspiration from cheesecake and truffle traditions. Cheesecake itself dates back to ancient Greece but has evolved into many regional variations. Bite-sized coated confections became popular in contemporary dessert culture as party-friendly alternatives to slices. Decorating with colored melts taps into the modern tradition of themed seasonal confections common at American holiday gatherings.
Seasonal Adaptations
Adapt the colors and toppings for any holiday: use pink and red for Valentine’s Day with freeze-dried raspberries, orange and black for Halloween with crushed candy corn, or pastels for spring with lemon zest in the filling. For wintery flavors, fold 1/2 teaspoon peppermint extract into the base and swap sprinkles for crushed candy canes. Add a tablespoon of cocoa powder and use dark chocolate coating for a richer, more sophisticated bite for New Year’s celebrations.
Meal Prep Tips
Make the base up to 48 hours ahead, roll the balls, and keep them chilled on a tray ready to dip on the day of the event. This saves time and prevents melted coatings from sweating. Prepare the colored melts in microwave-safe bowls and transfer warmed melts to shallow vessels for fast dipping. Use a small cookie scoop for uniform bites and store extras in stackable containers lined with parchment to prevent sticking. Label containers with date to track freshness.
These little treats bring a lot of joy with minimal fuss. They’re perfect for last-minute entertaining, gift boxes, and activities with family. Try a batch this season and make the flavors your own.
Pro Tips
Chill the mixture before rolling to get smoother, firmer balls that are easier to dip.
Thin candy melts with a small amount of neutral oil or vegetable shortening for a shinier, smoother coating.
Use a 1-inch cookie scoop for uniform size and quicker assembly.
If white chocolate seizes, add a teaspoon of vegetable oil and stir gently until smooth.
Store coated bites in a single layer separated by parchment to prevent sticking.
This nourishing no-bake christmas cheesecake bites recipe is sure to be a staple in your kitchen. Enjoy every moist, high protein slice — it is perfect for breakfast or as a wholesome snack any time.
Tags
No-Bake Christmas Cheesecake Bites
This No-Bake Christmas Cheesecake Bites recipe makes perfectly juicy, tender, and flavorful steak every time! Serve with potatoes and a side salad for an unforgettable dinner in under 30 minutes.
Ingredients
Cheesecake Mixture
Coating & Decoration
Instructions
Prepare the cream cheese
Beat 8 ounces of room-temperature cream cheese in a large bowl until smooth and lump-free, about 1 to 2 minutes using a hand mixer. Scrape down the sides to ensure even texture.
Sweeten and flavor
Add 1/2 cup powdered sugar and 1 teaspoon vanilla extract. Mix on low until combined, then briefly increase speed to achieve a silky consistency.
Melt the white chocolate
Melt 1 cup white chocolate chips in 20-second microwave intervals, stirring between each, until glossy and smooth. Let cool slightly then fold into the cream cheese base.
Add crumbs and whipped topping
Stir in 1 cup crushed graham crackers until mixture holds together, then gently fold in 1/2 cup thawed whipped topping to keep the filling light.
Chill and shape
Refrigerate the mixture for 30 to 40 minutes to firm. Roll into 1-inch balls using a small scoop and place on a parchment-lined baking sheet. Chill again if needed.
Melt and color the coating
Melt red and green candy melts in separate bowls following package instructions. Thin with 1/4 tsp oil if needed for dipping consistency.
Dip and decorate
Submerge each chilled ball into the colored coating, tap off excess, and set on parchment. Add sprinkles before coating sets. Chill 15 to 20 minutes until firm.
Last Step: Please leave a rating and comment letting us know how you liked this recipe! This helps our business to thrive and continue providing free, high-quality recipes for you.
Nutrition
Did You Make This?
Leave a comment & rating below or tag
@flavordaisy on social media!
Categories:
You might also like...

Air Fryer Buffalo Cauliflower
Crispy battered cauliflower tossed in tangy Buffalo sauce — a spicy, vegetarian party favorite that's easy to make in the air fryer.

Air Fryer Parmesan Crusted Chicken
Crispy, golden air fryer chicken coated in a crunchy Parmesan-panko crust — a quick, family-friendly dinner that's juicy inside and perfectly seasoned.
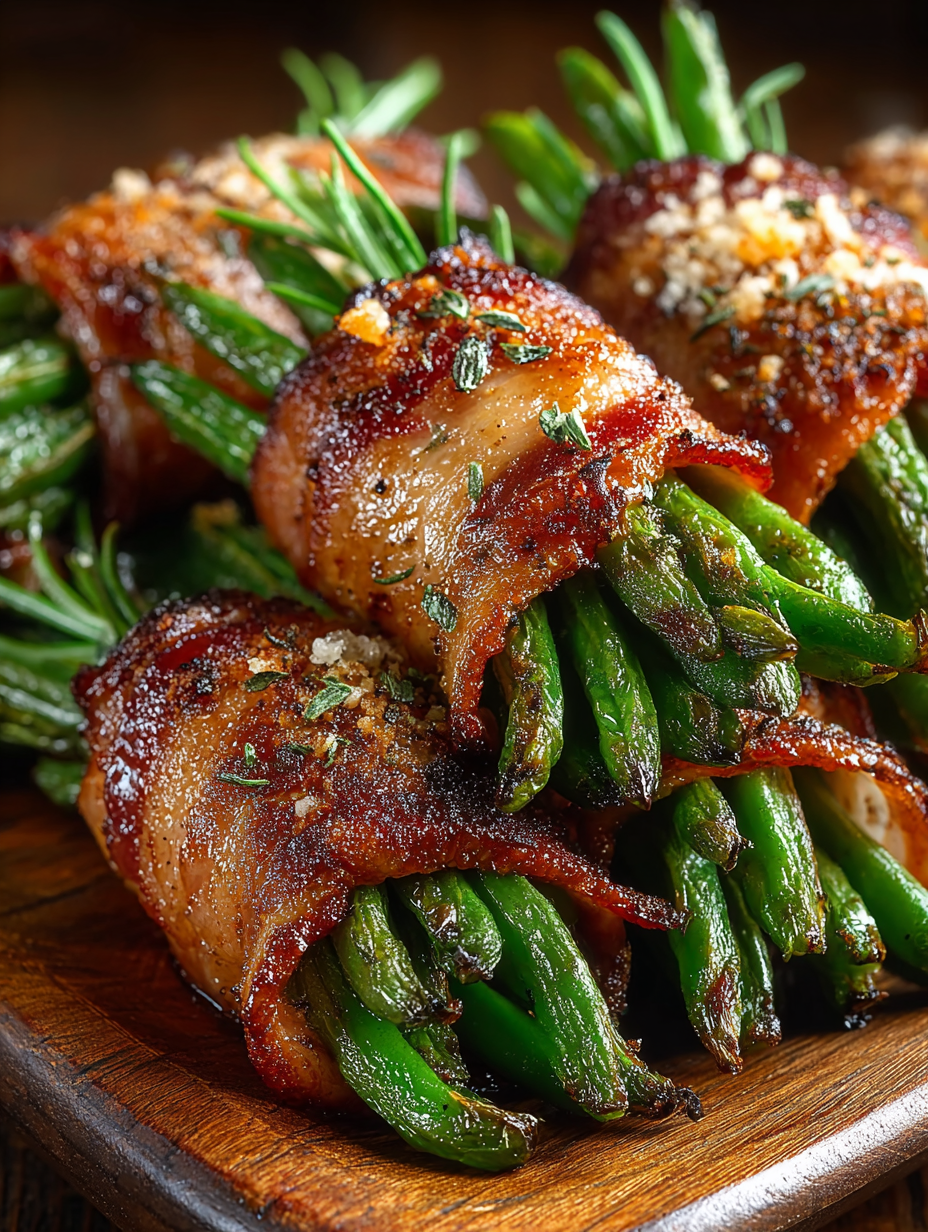
Bacon Wrapped Green Bean Bundles
Crisp tender green beans wrapped in savory bacon and finished with an optional sweet soy glaze. Perfect for parties and holiday spreads.
Did You Make This?
Leave a comment & rating below or tag @flavordaisy on social media!
Rate This Recipe
Share This Recipe
Enjoyed this recipe? Share it with friends and family, and don't forget to leave a review!
Comments (1)
This recipe looks amazing! Can't wait to try it.
Comments are stored locally in your browser. Server comments are displayed alongside your local comments.

Hi, I'm Chef!
What's Popular

30-Minute Meals!
Join to receive our email series which contains a round-up of some of our quick and easy family favorite recipes.