
Grinch Mini Cheesecake

Tiny, vibrant green cheesecakes with an Oreo crust — easy to make, perfect for holiday parties and kid-friendly celebrations.
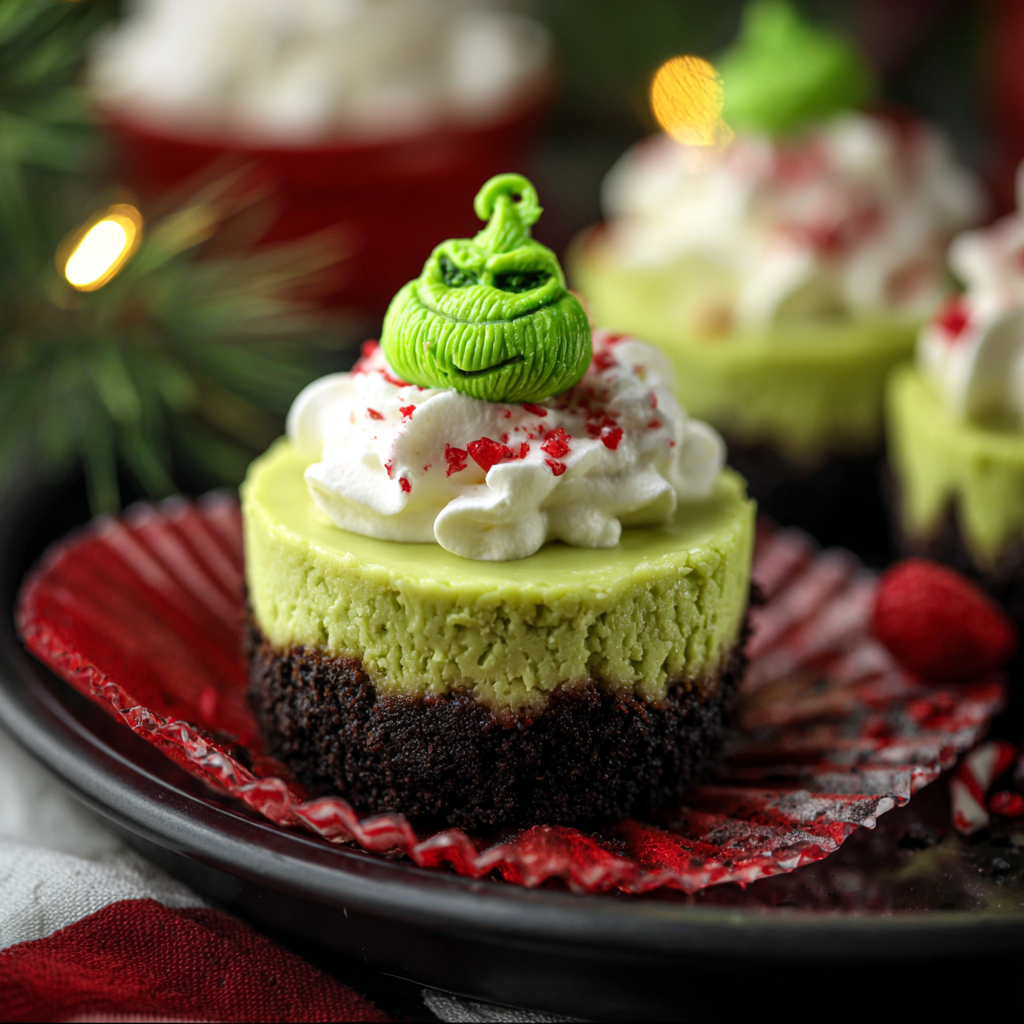
This batch of Grinch mini cheesecake began its life as a silly idea for a holiday party and quickly became a household favorite. I discovered this version while planning a themed cookie swap: I wanted something that felt festive, was simple to portion, and could be made ahead without losing its charm. The neon-green filling is showy but the flavor is classic — rich cream cheese, a kiss of vanilla, and just the right amount of sweetness sitting on a chocolatey Oreo base. My family calls them "tiny troublemakers" because the color makes everyone grin before they even take a bite.
What makes these so special is the balance between the crunchy, slightly salty Oreo crust and the silky, dense filling. They bake quickly in a standard muffin tin, come out with a gently jiggly center that firms as they chill, and they keep beautifully for several days in the refrigerator. I first tried this combination by swapping a traditional graham crust for Oreo crumbs and the result had everyone asking if they were from a bakery. These are excellent for parties, classroom treats, or just a fun weekend project with kids — the color brings instant excitement without complicated steps.
Why You'll Love This Recipe
- Makes about 12 handheld portions that are perfect for parties, lunches, or passing around at potlucks — no slicing required.
- Ready in under 45 minutes from start to finish (15–17 minutes of baking plus chilling), with most of the time hands-off while they cool and firm.
- Uses pantry staples and one small swap — Oreo cookies for the crust — which adds a chocolate contrast without extra steps.
- Kid-friendly assembly: kids can help press the crust and add the drops of neon green coloring for instant fun and ownership of the process.
- Make-ahead friendly: prepare a day in advance and refrigerate; they hold shape well and slice into themed boxes for gifting.
- Customizable: top with whipped cream, festive sprinkles, or a tiny candy heart for a whimsical touch.
In my experience these disappear faster than I can arrange them on a platter. At one holiday brunch my niece declared them "the best green cake ever" and promptly requested them for her birthday — that sealed the deal. They travel well to potlucks and you can easily double the batch without complicating the workflow.
Ingredients
- Oreo crumbs (for crust): Use about 1 cup of fine Oreo crumbs (roughly 10–11 regular Oreos). Process whole cookies including filling for deeper chocolate flavor; this provides a sturdy base that holds up to the creamy filling.
- Butter: 2 1/2 tablespoons melted; use unsalted and adjust a pinch of salt if using salted butter. Melt gently to avoid separating and mix until crumbs are evenly moistened so the crust presses together cleanly.
- Cream cheese: Two 8-ounce blocks (16 ounces total), softened to room temperature. Full-fat yields the smoothest texture — brands like Philadelphia give reliably consistent results.
- Sugar: 1/2 cup granulated sugar for balanced sweetness; you can substitute fine caster sugar if preferred for a slightly quicker dissolve.
- Eggs: 2 large eggs at room temperature help the filling set without cracking; let them sit on the counter 15–20 minutes before mixing.
- Vanilla extract: 1 teaspoon — pure vanilla is worth it here for depth of flavor.
- Neon green food coloring: A few drops (or gel) to achieve the Grinchy color; gel food coloring gives more vivid color with less liquid.
- Optional toppings: Whipped cream and festive sprinkles to make them party-ready.
Instructions
Preheat and line: Preheat your oven to 350°F. Line a 12-cup muffin tin with paper liners. Using liners makes removal simpler and keeps the cheesecakes neat; if you prefer, use silicone liners for an easy unmolding option. Make the crust: Place about 10–11 Oreos in a food processor and pulse until you have roughly 1 cup of fine crumbs. Add 2 1/2 tablespoons of melted butter and pulse until the mixture resembles wet sand and clumps when pressed between your fingers. If you don’t have a food processor, place cookies in a sealed bag and crush with a rolling pin, then mix with melted butter in a bowl. Press the crust: Divide the Oreo crumb mixture evenly among the 12 liners (about 1 heaping tablespoon per cup). Press firmly with the back of a spoon or a small measuring cup to form an even, compact base about 1/4-inch thick. A firm press prevents the crust from crumbling when you bite into the finished product. Beat the filling: In a medium bowl, beat 16 ounces of softened cream cheese and 1/2 cup sugar with an electric mixer on medium speed until completely smooth and free of lumps (about 2–3 minutes). Scrape the bowl, then add 2 room-temperature eggs one at a time, mixing just until combined to avoid over-aerating. Stir in 1 teaspoon vanilla. Color and portion: Add neon green food coloring a drop or two at a time, stirring until you reach a vivid Grinch-like hue. Gel color concentrates are easiest — start small and increase. Spoon about 1/4 cup of the filling into each prepared cup, distributing evenly but not overfilling; the filling should sit slightly above the crust level. Bake: Bake at 350°F for 15–17 minutes. Centers should still look slightly jiggly when you gently shake the pan; they will set as they cool. Avoid overbaking to maintain the creamy texture. If the tops brown slightly, rotate the pan halfway through baking to even out heat exposure. Cool and chill: Remove the tin from the oven and allow the mini cheesecakes to cool completely at room temperature (about 30–40 minutes). Once cooled, refrigerate for at least 2 hours, preferably 4, until fully firm. Chill longer for easier topping and cleaner slices. Finish and serve: When ready to serve, top with a small dollop of whipped cream and sprinkles. For a whimsical touch, add a tiny red sprinkle to mimic the Grinch’s accessory or a mini candy heart.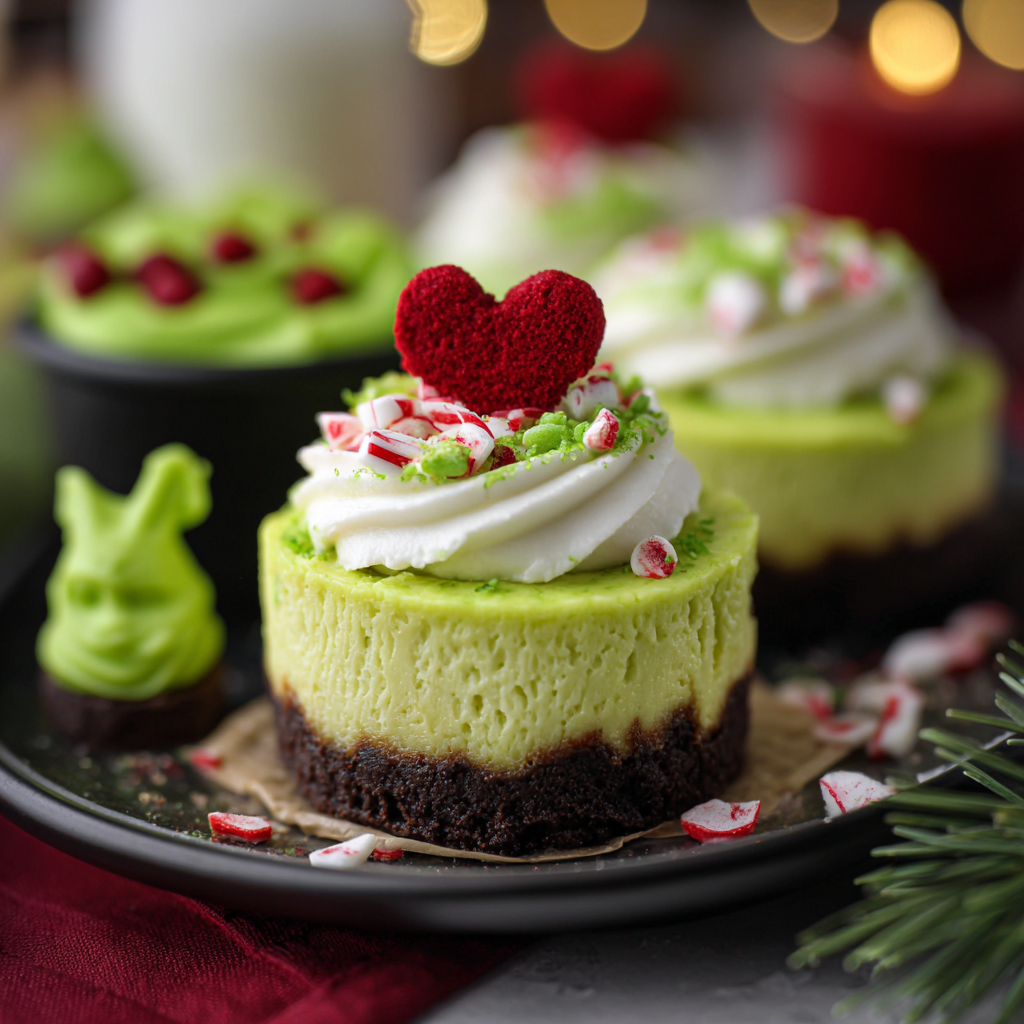
You Must Know
- Refrigerate for at least 2 hours; they firm up and develop the proper texture when chilled (best after 4 hours or overnight).
- Store in an airtight container in the refrigerator for up to 4 days; these freeze well for up to 3 months if wrapped individually and placed in a freezer-safe container.
- High in calories and fat relative to portion size — each mini contains concentrated cream cheese and butter (treat-like indulgence).
- Bring to room temperature for 10–15 minutes before serving to soften slightly and release flavor, but don’t leave out for more than 2 hours for food safety.
I love how portable and adaptable these are. For a family potluck, I made them a day ahead and they arrived looking flawless; the children squealed over the color and the adults appreciated the well-balanced sweetness. They’re a simple way to make a themed treat feel thoughtful without complicated techniques.

Storage Tips
Once chilled, store the portions in a shallow airtight container with a single layer of parchment between rows to prevent sticking. Keep them refrigerated for up to 4 days; if you need to extend the life, freeze tightly wrapped minis in twos or threes placed in a freezer box for up to 3 months. To reheat from frozen, thaw overnight in the refrigerator and let sit 10–15 minutes at room temperature for best texture. For travel, pack chilled cheesecakes in a cooler with ice packs to maintain firm structure and prevent condensation.
Ingredient Substitutions
If you prefer a less-sweet crust, substitute half the Oreos for plain chocolate wafer cookies or graham cracker crumbs. For a lighter filling, you can replace up to half the cream cheese with full-fat Greek yogurt, though texture will be slightly softer and tangier. Swap granulated sugar for an equal amount of powdered sugar to smooth the filling further, but reduce any additional liquids to avoid thinning. Use natural food coloring if you prefer less artificial coloring — be prepared for a subtler green that may require a decorative, festive garnish to read as "Grinch".
Serving Suggestions
Present these on a white platter with a dusting of edible snow (powdered sugar) or cluster them around a small centerpiece for a holiday spread. Pair with strong coffee, spicy hot chocolate, or a bright citrus punch to cut through the richness. Garnish each with a small piped rosette of whipped cream and red nonpareils for contrast. For a kid’s party, package two per small box with a ribbon — they make charming favors.
Cultural Background
Mini cheesecakes are an American-born adaptation of the classic cheesecake, made portable and individual-sized for social gatherings and portion control. The Oreo crust nods to the long-standing popularity of sandwich cookies as a base in American desserts. This green "Grinch" variation is an example of playful holiday reinterpretation: familiar flavors remain, but color and presentation transform the dessert into a seasonal icon tied to modern pop-culture celebrations.
Seasonal Adaptations
Change the color and toppings to match the season: use pastel colors for spring parties, orange for Halloween with black sprinkles, or red and green for Christmas with festive candies. Swap the Oreo crust for ginger snaps in winter for a warm spice note, or use lemon cookies in summer for a brighter, tangy base. Adjust topping flavors — a dollop of lemon curd adds a refreshing zip in warmer months.
Meal Prep Tips
Prepare crusts and filling the day before to streamline assembly on the event day. Store the pressed crusts in the lined pan in the fridge, and whip up the filling last so it remains silky. Bake and chill overnight; on the day of serving, remove and decorate 30 minutes before guests arrive so the whipped cream holds shape but doesn’t weep. Portion into small containers for grab-and-go lunches — they make a decadent but controllable treat.
These little cheesecakes are one of my favorite make-ahead sweets: deceptively simple, full of personality, and endlessly adaptable. They’ve been a hit for holiday brunches, classroom parties, and impromptu dessert plates. Try them once and you’ll find yourself dreaming up more colors and themes to make them your own.
Pro Tips
Soften cream cheese to room temperature for at least 30 minutes to avoid lumps and overmixing.
Use gel food coloring for vivid color with minimal liquid added to the filling.
Press the crust firmly with the bottom of a measuring cup for an even, compact base.
Avoid overbaking; remove when centers are slightly jiggly to achieve creamy texture after chilling.
This nourishing grinch mini cheesecake recipe is sure to be a staple in your kitchen. Enjoy every moist, high protein slice — it is perfect for breakfast or as a wholesome snack any time.
FAQs about Recipes
How long should I chill the mini cheesecakes?
Yes. Chill for at least 2 hours, but 4 hours or overnight is best for a firm texture.
Can I freeze them?
Freeze individually wrapped minis in a freezer-safe container for up to 3 months; thaw overnight in the refrigerator.
Tags
Grinch Mini Cheesecake
This Grinch Mini Cheesecake recipe makes perfectly juicy, tender, and flavorful steak every time! Serve with potatoes and a side salad for an unforgettable dinner in under 30 minutes.
Ingredients
Crust
Filling & Topping
Instructions
Preheat and prepare pan
Preheat oven to 350°F and line a 12-cup muffin tin with paper liners.
Make Oreo crumbs
Pulse about 10–11 Oreos in a food processor until fine, then mix in 2 1/2 tablespoons melted butter until the mixture clumps when pressed.
Form crusts
Divide crumbs evenly among liners and press firmly to create a compact 1/4-inch crust using the back of a spoon or small measuring cup.
Prepare filling
Beat 16 ounces softened cream cheese with 1/2 cup sugar until smooth, add 2 eggs one at a time, then stir in 1 teaspoon vanilla. Add green food coloring until desired shade is reached.
Fill cups and bake
Spoon about 1/4 cup filling into each crust-lined cup and bake at 350°F for 15–17 minutes until centers are slightly jiggly.
Cool and chill
Cool completely at room temperature (30–40 minutes) then refrigerate for at least 2 hours, preferably 4, until firm.
Top and serve
Top each mini with a small dollop of whipped cream and sprinkles as desired. Serve chilled or at room temperature for 10–15 minutes.
Last Step: Please leave a rating and comment letting us know how you liked this recipe! This helps our business to thrive and continue providing free, high-quality recipes for you.
Nutrition
Did You Make This?
Leave a comment & rating below or tag
@flavordaisy on social media!
Categories:
You might also like...

Air Fryer Buffalo Cauliflower
Crispy battered cauliflower tossed in tangy Buffalo sauce — a spicy, vegetarian party favorite that's easy to make in the air fryer.
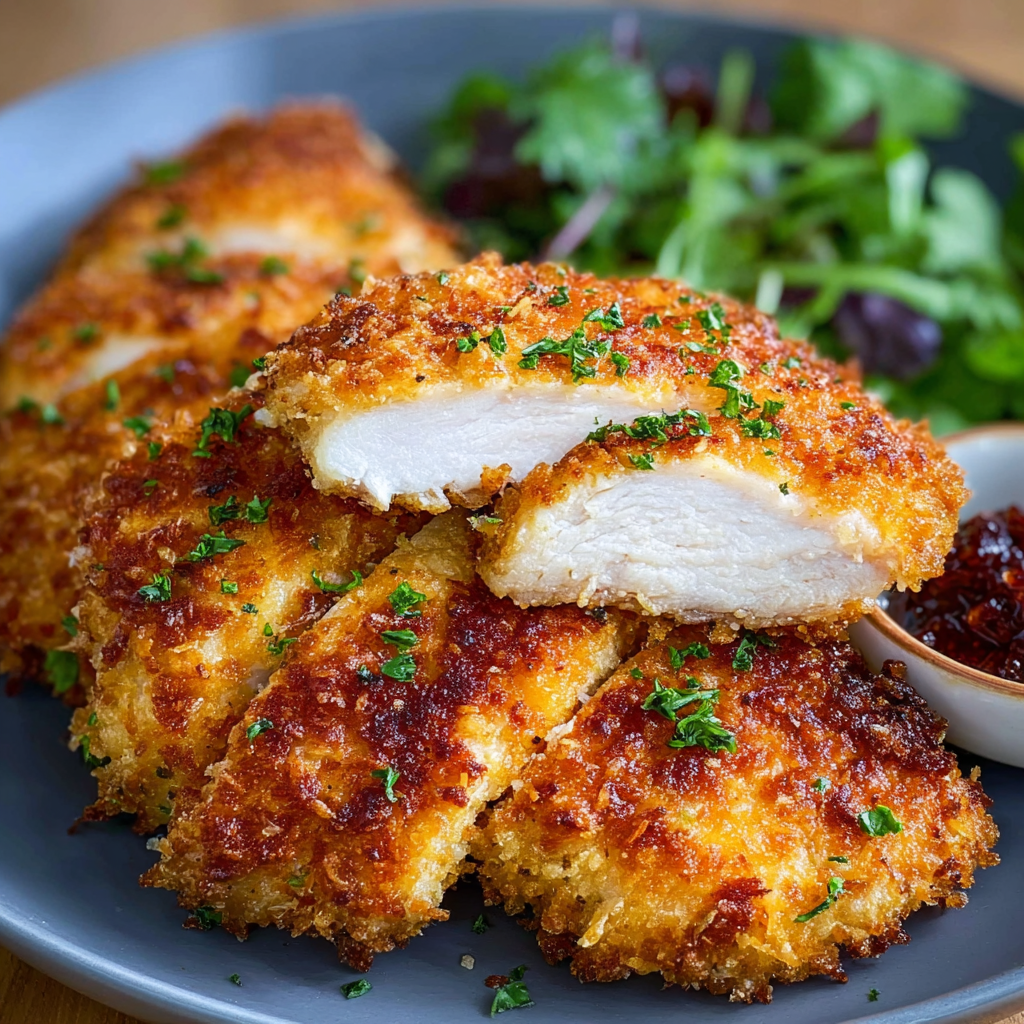
Air Fryer Parmesan Crusted Chicken
Crispy, golden air fryer chicken coated in a crunchy Parmesan-panko crust — a quick, family-friendly dinner that's juicy inside and perfectly seasoned.
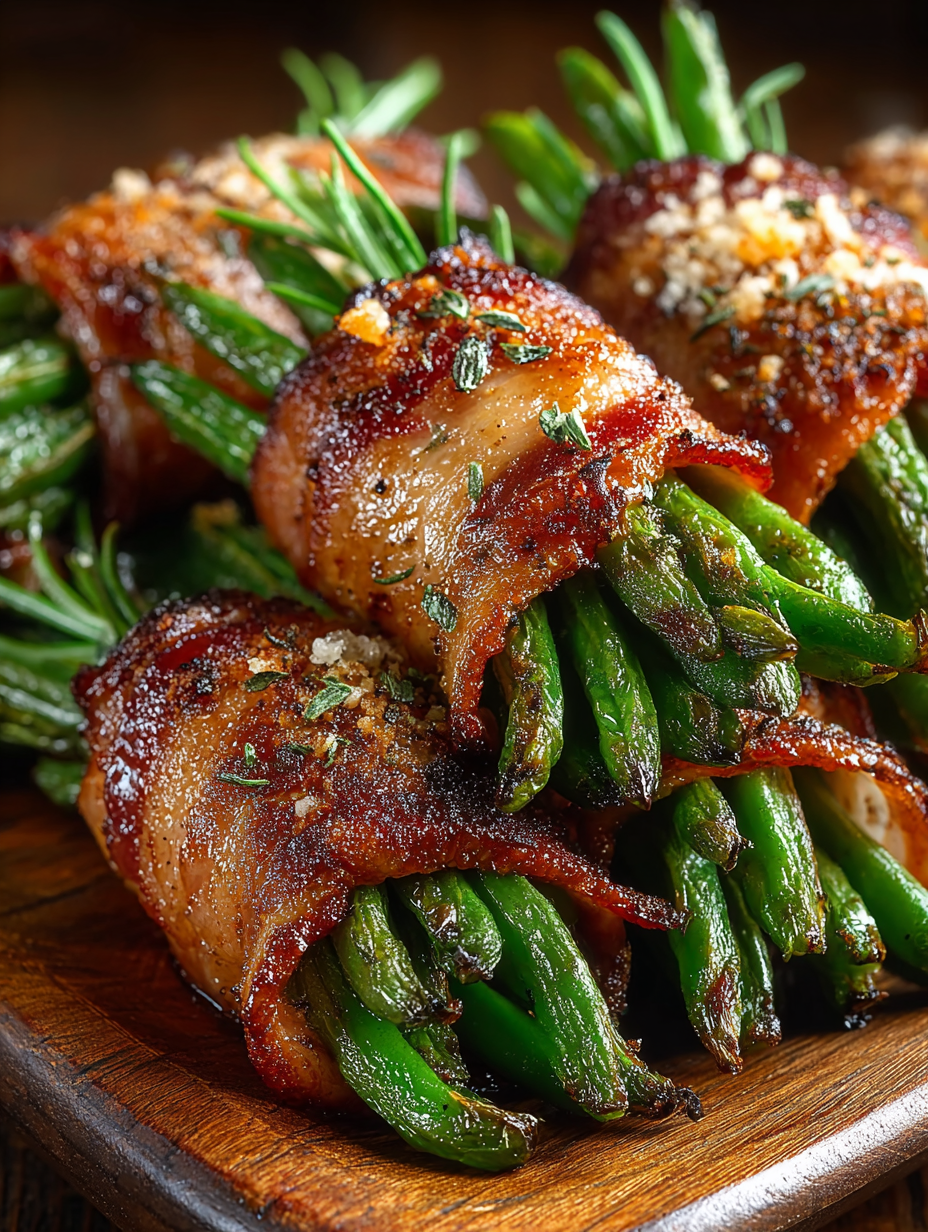
Bacon Wrapped Green Bean Bundles
Crisp tender green beans wrapped in savory bacon and finished with an optional sweet soy glaze. Perfect for parties and holiday spreads.
Did You Make This?
Leave a comment & rating below or tag @flavordaisy on social media!
Rate This Recipe
Share This Recipe
Enjoyed this recipe? Share it with friends and family, and don't forget to leave a review!
Comments (1)
This recipe looks amazing! Can't wait to try it.
Comments are stored locally in your browser. Server comments are displayed alongside your local comments.

Hi, I'm Chef!
What's Popular
30-Minute Meals!
Join to receive our email series which contains a round-up of some of our quick and easy family favorite recipes.