
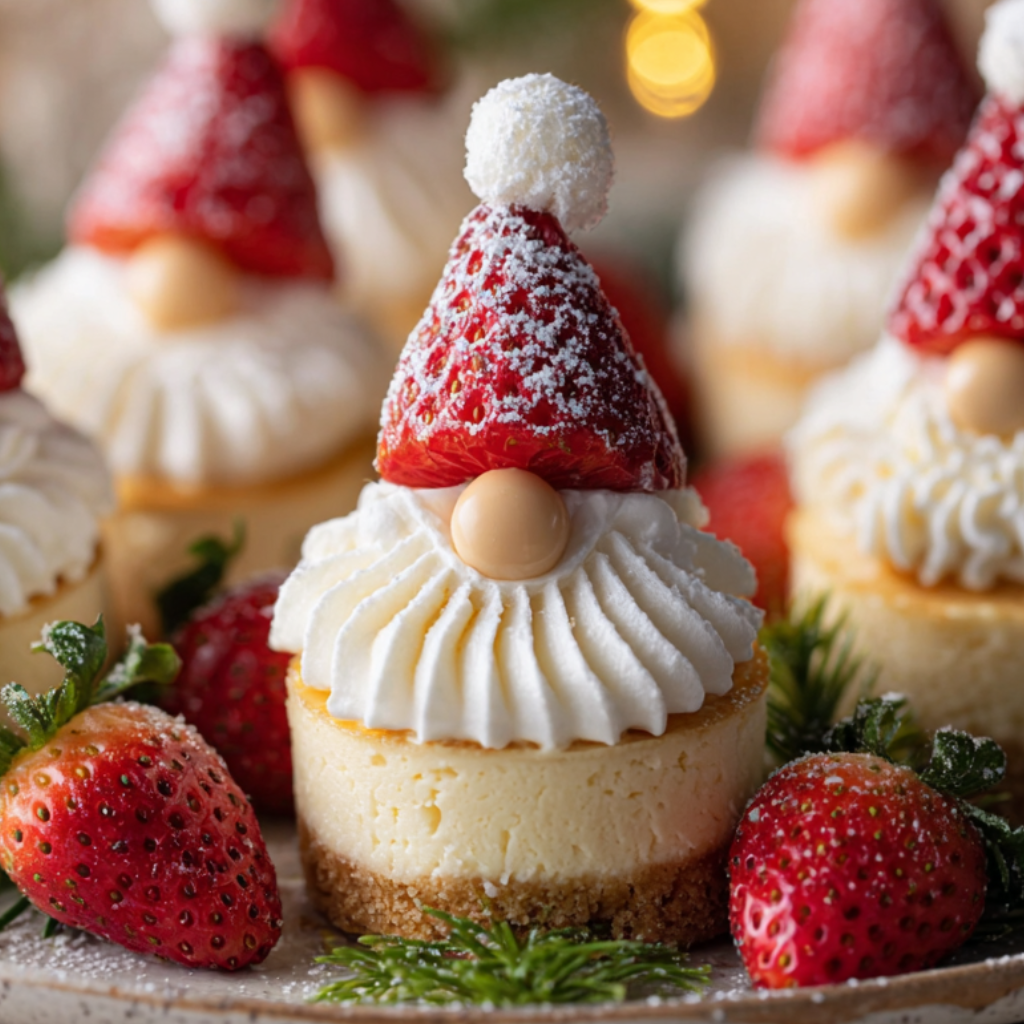
Gnome Mini Cheesecakes

Whimsical, bite-sized cheesecakes topped with jam, meringue hats, and edible sprinkles — perfect for parties, kids, and holiday gatherings.
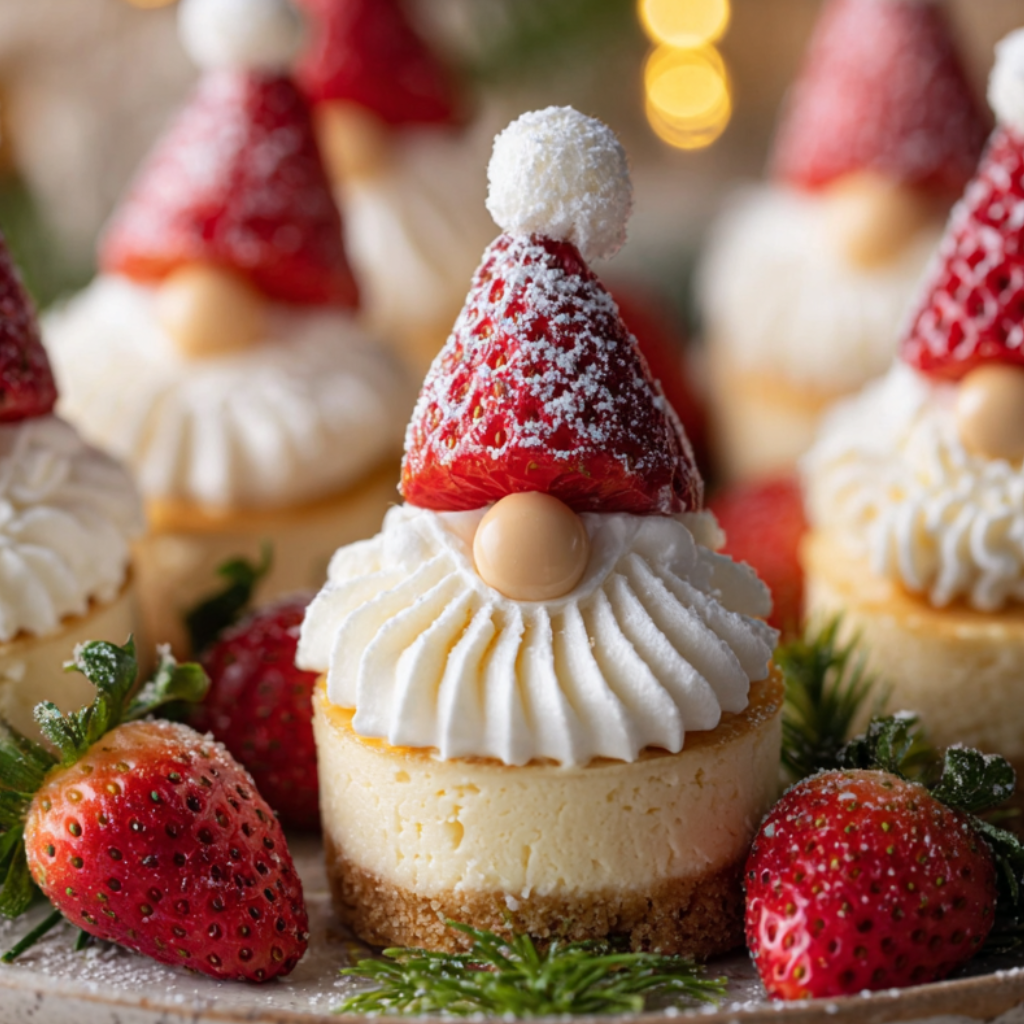
This little tray of Gnome Mini Cheesecakes started as a playful idea the first spring I wanted to make something that felt festive but also easy enough for a weekday bake. I was inspired by a craft fair stall selling tiny felt gnomes; the colors and shapes stuck with me, and I thought—why not edible ones? These petite portions capture all the creamy tang of a classic cheesecake but in a single-bite form that kids love and adults find irresistible. They're creamy, slightly tangy, and finished with a crunchy crust that holds up well while you pick them up with your fingers.
I discovered this combination the weekend before a neighborhood potluck. I wanted something crowd-pleasing that could be made ahead, transported easily, and served at room temperature. I experimented with a simple graham cracker crust and scaled the filling down to fit a standard 12-cup muffin tin. The first batch vanished within fifteen minutes. What makes them special is the balance of textures: a buttery crumb base, a rich velvety center, and a playful topping—whether it's a jam cap, a piped meringue hat, or a candied citrus twist. They bring smiles and are almost impossible to resist.
Why You'll Love This Recipe
- Ready in about 1 hour active time and chillable overnight, these are perfect for last-minute parties and holiday trays.
- Uses pantry staples—cream cheese, sugar, eggs, and graham crackers—so you can bake without a special grocery run.
- Mini portions mean easy portion control and great for kids' lunches, party platters, or charming dessert samplers.
- Make-ahead friendly: bake the day before and decorate the morning of; they travel well in a shallow container.
- Customizable toppings let you accommodate dietary needs and seasonal flavors, from lemon curd to berry jam or toasted nuts.
- Low-effort decoration creates a big visual impact; no piping expertise required for adorable results.
I still remember my neighbor Anna’s reaction when she bit into one—she closed her eyes, smiled, and asked for the recipe. Since that first potluck, these have appeared at birthdays, small holiday gatherings, and even as a surprise after-school treat. Kids love the small size, and grown-ups appreciate the clean, balanced flavor.
Ingredients
- Cream cheese: Use 16 ounces (2 blocks) full-fat cream cheese, softened to room temperature. Philadelphia brand is a reliable choice for a smooth, tangy base that sets well.
- Sour cream: 1/3 cup sour cream adds silkiness and a slight tang. If you prefer a lighter finish, use plain full-fat Greek yogurt but expect a slightly less creamy mouthfeel.
- Sugar: 2/3 cup granulated sugar provides sweetness without masking the cheese flavor. For a deeper caramel note, substitute 2 tablespoons with light brown sugar.
- Eggs: 2 large eggs at room temperature help stabilize and set the filling. Room-temperature eggs incorporate more smoothly into the cream cheese mixture.
- Vanilla extract: 1 teaspoon pure vanilla for aromatic depth. Use Nielsen-Massey if you have it on hand.
- Graham cracker crumbs: 1 1/2 cups finely crushed (about 10 full crackers). If you can’t find graham crackers, use digestive biscuits as a direct swap.
- Unsalted butter: 6 tablespoons melted to bind the crust. Salted is fine—reduce added salt in the filling to balance.
- Lemon zest (optional): 1 teaspoon finely grated to brighten the filling and lift the flavors.
- Toppings: Jam, mini marshmallows, meringue kisses, fresh berries, or edible flower petals—about 1/2 cup total, divided among 12 mini cheesecakes.
Instructions
Prepare the tin and crust: Preheat oven to 325°F. Line a 12-cup muffin tin with paper liners or spray well with nonstick spray. Combine 1 1/2 cups graham cracker crumbs with 6 tablespoons melted butter and 2 tablespoons sugar in a bowl. Divide roughly 1 tablespoon of crumb mixture into each cup and press down firmly with the back of a spoon until compact. Par-bake the crusts for 5 minutes to set them; this helps prevent soggy bottoms. Remove and let cool slightly. Make the filling: Beat 16 ounces softened cream cheese in a mixer on medium speed until completely smooth, about 2 minutes, scraping the bowl. Add 2/3 cup granulated sugar and beat another 1–2 minutes until light. Mix in 2 large room-temperature eggs one at a time, incorporating fully after each addition. Add 1/3 cup sour cream, 1 teaspoon vanilla extract, and 1 teaspoon lemon zest if using; beat until silky and no lumps remain. Avoid overbeating to prevent excess air, which can cause cracks. Fill and bake: Spoon or pipe the filling evenly into the prepared crusts, filling each cup nearly to the top but leaving a small lip for expansion. Tap the pan gently on the counter to release any air bubbles. Bake at 325°F for 18–22 minutes; centers should be set but still slightly jiggly in the very middle. Rotate the pan halfway through baking for even color. Excessive browning means the oven is too hot; reduce temperature by 10°F next time. Cool and chill: Turn the oven off and crack the door open; let the cheesecakes sit inside for 15 minutes to avoid dramatic temperature changes that cause cracks. Remove to a wire rack and cool to room temperature, then refrigerate uncovered for at least 2 hours or overnight for the best texture. Chilling firms the centers and makes them easy to top and transport. Decorate: Top each mini with 1 teaspoon jam, a tiny meringue kiss, fresh berry, or a swirl of whipped cream just before serving. For a gnome look, use a small cone of meringue or whipped cream as the hat and a raspberry or candy nose. Sprinkle edible glitter or colored sugar for festive flair.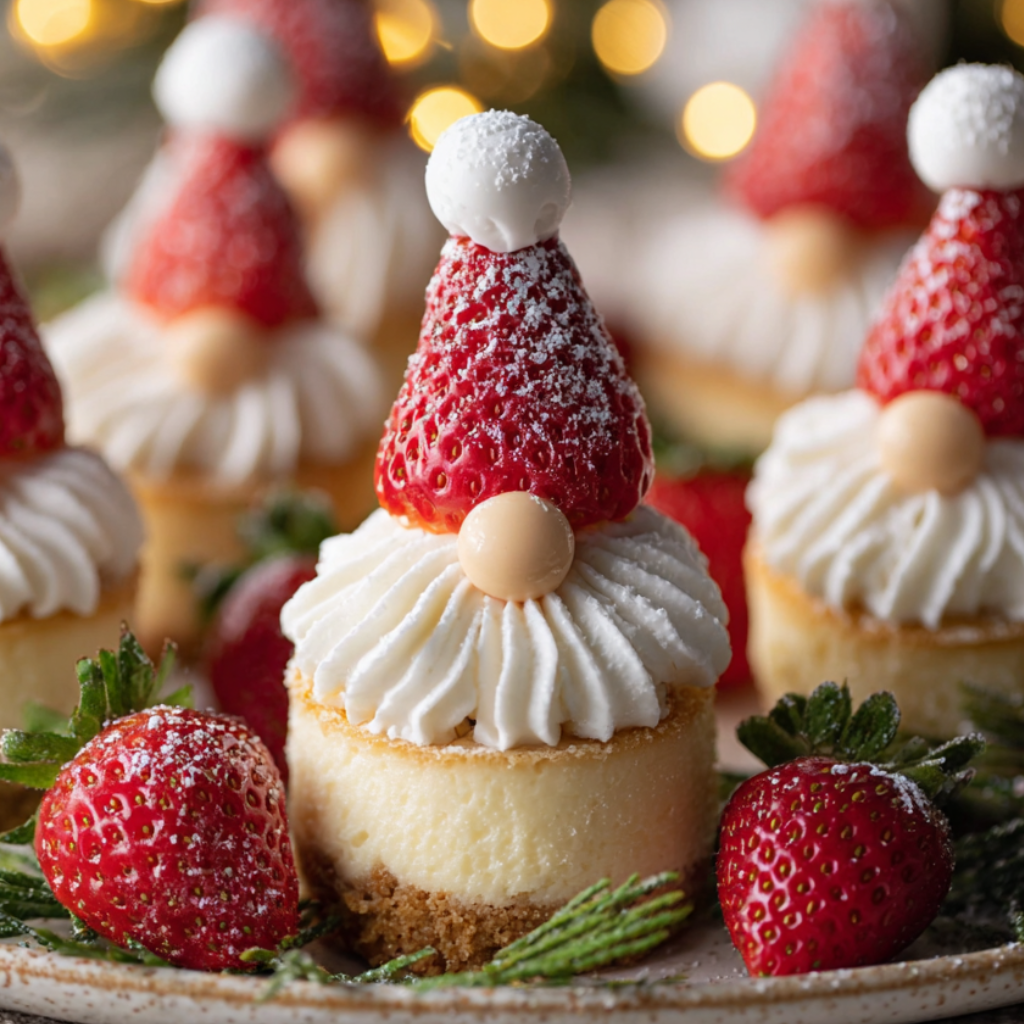
You Must Know
- These keep well refrigerated for up to 3 days; store in an airtight container with parchment layers to prevent sticking.
- Freeze unadorned cheesecakes for up to 3 months; thaw overnight in the refrigerator before decorating.
- Using room-temperature ingredients, especially eggs and cream cheese, ensures a lump-free, smooth texture.
- Aim for gentle beating—overworking the batter adds air and risks cracking and a grainy texture.
- Small tins work best: a standard 12-cup muffin pan yields perfectly sized minis; foil liners can help with transport.
My favorite aspect is how flexible these are—one week I top them with lemon curd and toasted coconut, the next with salted caramel and pecans. My kids always help with decoration: they assign each gnome a name and a personality, turning a simple dessert into a storytelling activity. Those small hands and glittery sugar make the cheesecakes feel extra special every time.
Storage Tips
Store finished, decorated minis in a single layer in an airtight container in the refrigerator for up to 3 days. If stacking is necessary, place parchment or wax paper between layers to protect decorations. For longer storage, freeze plain cheesecakes (no fresh fruit or meringue) on a tray until firm, then wrap individually in plastic wrap and place in a freezer bag for up to 3 months. To serve from frozen, thaw in the refrigerator overnight and add delicate toppings just before serving. Reheat is not recommended—these are best served chilled or at cool room temperature.
Ingredient Substitutions
If dairy is a concern, try a cream-cheese-style vegan alternative; expect a slightly different set and texture but similar tang. For a gluten-free crust, substitute gluten-free graham crumbs or crushed gluten-free cookies 1:1. To reduce sugar, cut granulated sugar to 1/2 cup and use a fruit jam with no added sugar for topping. Ricotta can be mixed with cream cheese for a lighter filling—use 12 ounces cream cheese and 4 ounces ricotta. Keep in mind each swap alters mouthfeel and setting behavior; if using non-dairy cheeses, chill longer to achieve a firmer slice.
Serving Suggestions
Serve these at room temperature for the best flavor release. Present them on a tiered platter for a garden party or arrange them in a decorative box for edible gifts. Pair with sparkling wine, lightly sweetened iced tea, or a rich espresso. Garnish with micro-mint leaves, thin lemon zest ribbons, or toasted almond slivers for texture contrast. For kids’ parties, provide a "decorate your own gnome" station with small bowls of jams, candies, and sprinkles—the activity is half the fun.
Cultural Background
Miniature desserts have long been a part of European tea culture and modern patisserie practice, where bite-sized portions allow guests to sample many flavors. Cheesecake itself traces back to ancient Greece, evolving through European variations to the creamy American style we recognize today. These mini versions are a modern playful take, combining classic American cheesecake flavors with whimsical decoration influences that echo Nordic folk art—hence the gnome inspiration.
Seasonal Adaptations
Adapt toppings to the season: late-summer berries and a basil chiffonade make bright summer bites; in autumn, swap jam for apple butter and top with toasted pecan crumbs. For winter holidays, use cranberry-orange compote and a tiny cinnamon stick as a garnish or add gingerbread crumbs to the crust. For spring celebrations, pastel-colored meringues and edible flowers create a fresh, garden-themed platter.
Meal Prep Tips
Prepare crusts and fillings in advance. Par-bake and cool the crusts, then store them airtight for up to 24 hours in the refrigerator before filling. The filling can be mixed and refrigerated for a few hours; bring back to room temperature and whisk briefly before filling cups. Bake and chill fully, then decorate the day of serving to keep fresh toppings vibrant. Use a disposable pastry bag or zip-top bag with a corner snipped for consistent filling portions during assembly.
These Gnome Mini Cheesecakes combine ease, whimsy, and classic flavor in a compact package. Whether you’re feeding a crowd or creating a special homemade gift, they deliver a lot of joy for a small investment of time. Try them once and you’ll find countless ways to adapt and personalize the little gnomes for any celebration.
Pro Tips
Use room-temperature ingredients to ensure a smooth, lump-free filling.
Par-bake the crust for 5 minutes to prevent soggy bottoms.
Let cheesecakes cool gradually in the oven with the door cracked to reduce cracking.
Chill cheesecakes for at least 2 hours or overnight for the best texture.
This nourishing gnome mini cheesecakes recipe is sure to be a staple in your kitchen. Enjoy every moist, high protein slice — it is perfect for breakfast or as a wholesome snack any time.
FAQs about Recipes
Can I freeze these mini cheesecakes?
Yes — bake as directed and freeze unadorned minis on a tray until solid, then wrap individually and store in a freezer bag for up to 3 months. Thaw overnight in the refrigerator before decorating.
How do I avoid lumps and cracks in the filling?
Use room-temperature cream cheese and eggs. Beat the cream cheese first until smooth, then add sugar, and add eggs one at a time to avoid lumps. Avoid overbeating to prevent cracks.
How do I know when the minis are done baking?
Room temperature, slightly jiggly centers indicate doneness. The edges should be set and the center should wobble just slightly — it will firm up as it chills.
Tags
Gnome Mini Cheesecakes
This Gnome Mini Cheesecakes recipe makes perfectly juicy, tender, and flavorful steak every time! Serve with potatoes and a side salad for an unforgettable dinner in under 30 minutes.
Ingredients
Crust
Filling
Toppings
Instructions
Prepare crust
Preheat oven to 325°F. Combine graham crumbs, melted butter, and sugar. Divide into muffin cups and press firmly. Par-bake for 5 minutes and cool slightly.
Make filling
Beat softened cream cheese until smooth, add sugar and beat until light. Add eggs one at a time, then sour cream, vanilla, and zest. Avoid overmixing.
Fill and bake
Spoon filling into crusts, tap to release air bubbles, and bake 18–22 minutes at 325°F until centers are slightly jiggly. Rotate pan halfway if needed.
Cool and chill
Let cheesecakes rest in the turned-off oven with the door cracked for 15 minutes. Cool on a rack, then refrigerate for at least 2 hours or overnight.
Decorate and serve
Top with jam, meringue hats, berries, or other decorations just before serving. Store refrigerated and enjoy within 3 days.
Last Step: Please leave a rating and comment letting us know how you liked this recipe! This helps our business to thrive and continue providing free, high-quality recipes for you.
Nutrition
Did You Make This?
Leave a comment & rating below or tag
@flavordaisy on social media!
Categories:
You might also like...

Air Fryer Buffalo Cauliflower
Crispy battered cauliflower tossed in tangy Buffalo sauce — a spicy, vegetarian party favorite that's easy to make in the air fryer.
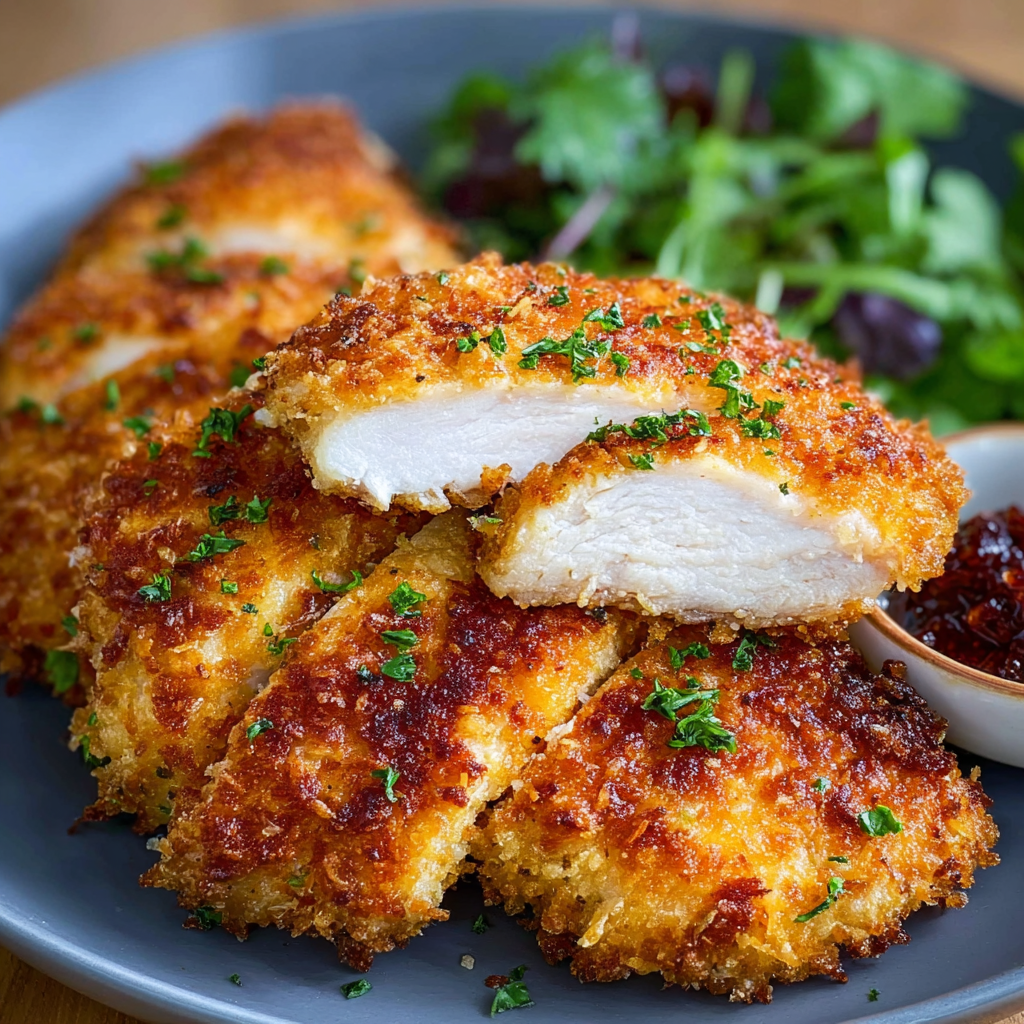
Air Fryer Parmesan Crusted Chicken
Crispy, golden air fryer chicken coated in a crunchy Parmesan-panko crust — a quick, family-friendly dinner that's juicy inside and perfectly seasoned.
Bacon Wrapped Green Bean Bundles
Crisp tender green beans wrapped in savory bacon and finished with an optional sweet soy glaze. Perfect for parties and holiday spreads.
Did You Make This?
Leave a comment & rating below or tag @flavordaisy on social media!
Rate This Recipe
Share This Recipe
Enjoyed this recipe? Share it with friends and family, and don't forget to leave a review!
Comments (1)
This recipe looks amazing! Can't wait to try it.
Comments are stored locally in your browser. Server comments are displayed alongside your local comments.

Hi, I'm Chef!
What's Popular
30-Minute Meals!
Join to receive our email series which contains a round-up of some of our quick and easy family favorite recipes.